Blazor Basics: Lazy Load Assemblies to Boost the Performance of Blazor WebAssembly

Learn how to implement lazy loading assemblies in Blazor WebAssembly to improve the app’s performance.
The biggest challenge and criticism Blazor WebAssembly faces is its first load performance.
There are several performance optimizations you can apply to improve the overall performance of a Blazor WebAssembly application. However, depending on the application’s size, the WebAssembly file downloaded to the client can cause a noticeable delay.
In this article, I will show you how to implement lazy loading assemblies into a Blazor WebAssembly application. This approach allows you to shrink the main assembly’s size and load more code on demand.
You can access the code used in this example on GitHub.
Introduction to Lazy Loading Assemblies
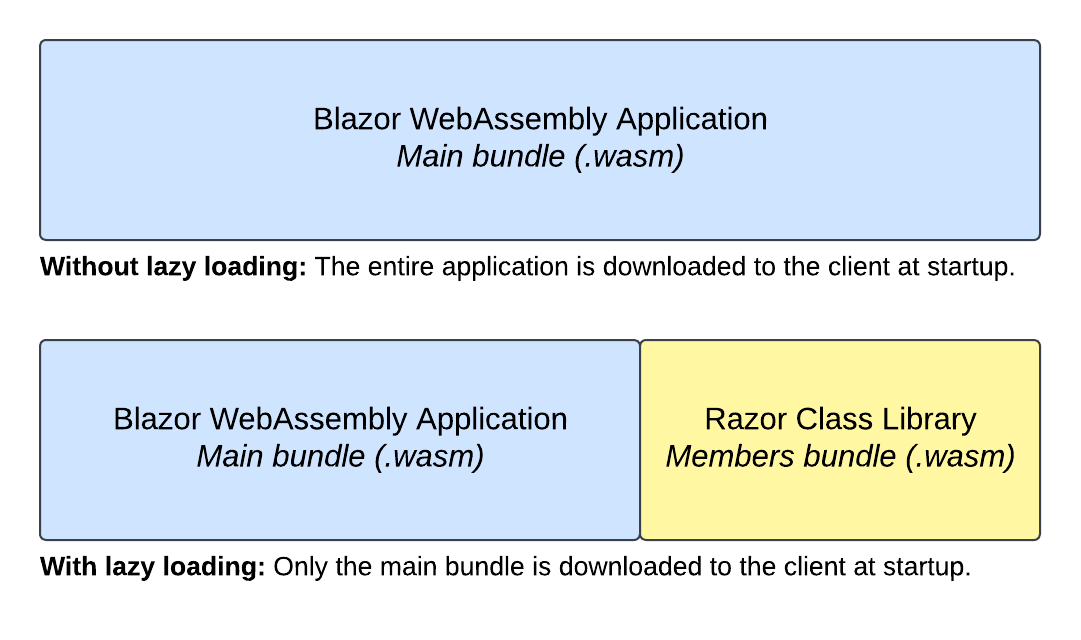
With lazy loading, we can defer the loading of an assembly until the user navigates to a route that requires the assembly.
For example, we have a member section on the website that is only used by 5% of visitors.

With lazy loading, we can let the client download the website without the member section.
When the user navigates to the member section, for example, by clicking on a link in a navigation menu, we load the assembly containing the member section.
Creating a Standalone Blazor WebAssembly Application
First, we create a Blazor WebAssembly Standalone application. Lazy loading also works when hosting the application using an ASP.NET Core server project, but we want to focus on the client-side WebAssemby application.
I name the application BlazorWasmLazyLoading. This name is important because I will use the same naming scheme when creating and referencing the Razor Class Library.
Creating a Razor Class Library
The foundation of implementing lazy loading for a Blazor WebAssembly application is splitting the components into different projects during development. We must create a Razor Class library and move all the components we want to lazy load from the main Client project into the Razor Class library.
In this example, we want to implement a member section, which will only be loaded when the user navigates to the /members route.
We create a new Razor Class Library and name it BlazorWasmLazyLoading.Members. In this Razor Class Library, I add a Pages folder and the following Members page component:
@page "/members"

<h1>Member Login</h1>

<input type="text" placeholder="Username" />
<input type="password" placeholder="Password" />
It’s a simple component for demonstration purposes, which registers itself with the Routing system for the /members route and renders some HTML that stylizes a login form.
We would put all components we want to use inside the members section into this Razor Class Library.
Adding a Project Reference
Now that we have a Razor Class Library project inside the solution, we need to add a project reference from the BlazorWasmLazyLoading project to the BlazorWasmLazyLoading.Members project.
You can use the user interface in your editor/IDE of choice, or you can add the following XML definition directly inside the .csproj file:
<ItemGroup>
 <ProjectReference Include="..\BlazorWasmLazyLoadingMembers\BlazorWasmLazyLoading.Members.csproj" />
</ItemGroup>
Add the BlazorWebAssemblyLazyLoad Property to the Project File
We also need to set a Blazor specific property inside the .csproj file of the Blazor WebAssembly application.
In the BlazorWasmLazyLoading.csproj file, we add the following XML definition:
<ItemGroup>
 <BlazorWebAssemblyLazyLoad Include="BlazorWasmLazyLoading.Members.wasm" />
</ItemGroup>
It specifies that the BlazorWasmLazyLoading.Members.wasm file should not be loaded on startup, even though it is referenced using a project reference.
The .wasm file extension is used for complied WebAssembly code, and we need to make sure to append the file extension to the definition in the project file.
Implementing Lazy Loading in the Router
We now have different parts for using lazy loading in a Blazor WebAssembly application. We created a Razor Class Library, referenced it in the main WebAssembly project, and added the required BlazorWebAssemblyLazyLoad property to its project file.
We are now ready to implement lazy loading in the Router component. Yes, we must tell the Router where to find certain page components and what assemblies to load when the user navigates to a specific route.
First, we open App.razor file in the Blazor WebAssembly application project, which contains the Router definition. We inject two new types into the component and add using statements to their namespaces.
@using Microsoft.AspNetCore.Components.WebAssembly.Services
@using System.Reflection

@inject LazyAssemblyLoader AssemblyLoader
@inject ILogger<Program> Logger
First, we need an instance of the LazyAssemblyLoader class, which we will use to lazy load the assemblies, as you might guess from its name.
Next, we also want to inject an instance of the ILogger type that allows us to write a log statement in case an error occurs.
<Router AppAssembly="@typeof(App).Assembly"
 AdditionalAssemblies="_lazyLoadedAssemblies"
 OnNavigateAsync="OnNavigateAsync">
 <!-- code omitted -->
</Router>
We add two new properties to the Router definition. First, we add the AdditionalAssemblies property and assign a private field, which we will create in code section shortly. Next, we add an OnNavigateAsync event handler to the OnNavigateAsync event property.
Now, we’re ready to implement the code section, which includes the logic that perform the lazy loading of the assemblies when required.
@code {
    private List<Assembly> _lazyLoadedAssemblies = new List<Assembly>();

    private async Task OnNavigateAsync(NavigationContext context)
    {
        try
        {
            if (context.Path == "members")
            {
                var assemblies = await AssemblyLoader.LoadAssembliesAsync(new[] { "BlazorWasmLazyLoading.Members.wasm" });
                _lazyLoadedAssemblies.AddRange(assemblies);
            }
        }
        catch (Exception ex)
        {
            Logger.LogError("Error: {Message}", ex.Message);
        }
    }
}
The OnNavigateAsync method is triggered when the user navigates from one page to another.
The NavigationContext object provides us with contextual information, such as the Path property containing the route the user tries to access.
We use a try-catch statement to catch any unforeseen errors and write a log statement in case an error occurs.
We check the Path whether it is equal to the members string. It means that the user tries to navigate to the /members route.
If that is the case, we use the AssemblyLoader property we injected at the top of the component and its LoadAssembliesAsync method to load the assembly. In this case, we want to load the code inside the BlazorWasmLazyLoading.Members project. Make sure to add the .wasm ending.
Last but not least, we add the loaded assemblies (you could load one or more assemblies) to the private _lazyLoadedAssemblies field, which we reference from the AdditionalAssemblies property on the Router component.
Testing Lazy Loading in a Blazor WebAssembly Application
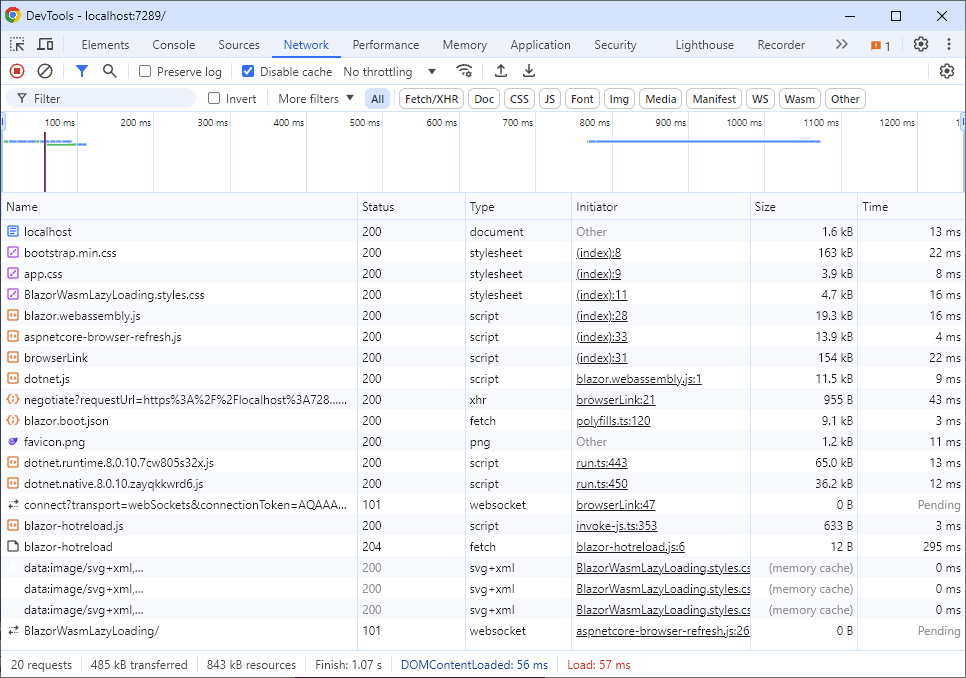
When we run the application, the default route ("/") of the web application is loaded.
When we open the developer tools (make sure to disable the cache) and reload the page, we can see that the Members assembly hasn’t been loaded.

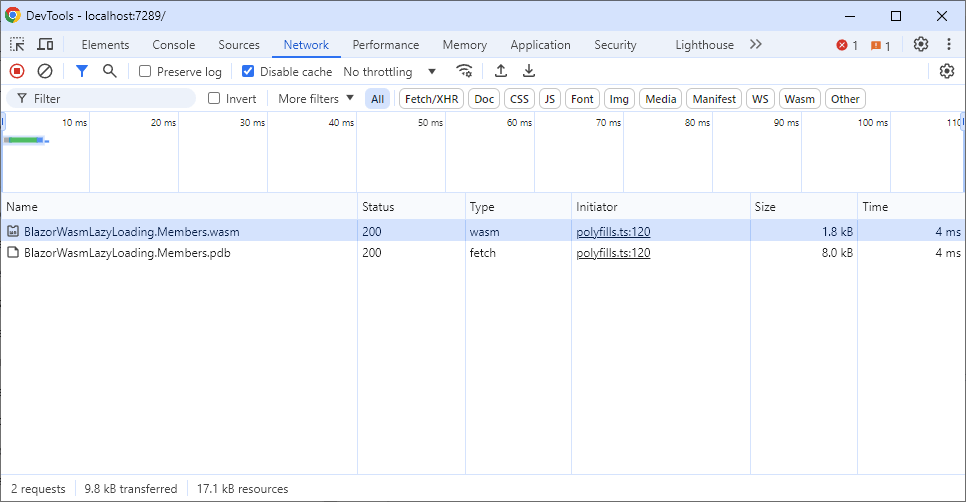
When we navigate to the /members route, the Members assembly is downloaded to the client and the members page is loaded.

How Lazy Loading Works Under the Hood
This takes us to the question of how lazy loading works in Blazor.
We use the LazyAssemblyLoader type, automatically registered with the dependency injection system at startup when using the WebAssemblyHostBuilder class in the Program.cs file.
The LazyAssemblyLoader type uses JavaScript Interoperability to fetch assemblies using an HTTP call from the server. It then loads the downloaded assemblies into the runtime executing on WebAssembly in the browser.
If there are any routable pages in the lazy loaded assembly, Blazor makes them available by registering the components with the Router.
Conclusion
With lazy loading, we can shrink the size of the main WebAssembly bundle downloaded to the client when the user visits the website. It can considerably reduce the WebAssembly bundle size and therefore the time until the website is loaded.
We get granular control over how we want to split the application into one or multiple lazy-loaded assemblies by splitting the components into different Razor Class Libraries.
In the App.razor file, we configure the Router to behave according to our application’s needs. We can lazy load one or multiple assemblies when the user navigates to a specific route.
Under the hood, the built-in LazyAssemblyLoader type uses JavaScript interoperability to fetch the WebAssembly bundles from the server on demand.
You can access the code used in this example on GitHub.
If you want to learn more about Blazor development, you can watch my free Blazor Crash Course on YouTube. And stay tuned to the Telerik blog for more Blazor Basics.

Claudio Bernasconi
Claudio Bernasconi is a passionate software engineer and content creator writing articles and running a .NET developer YouTube channel. He has more than 10 years of experience as a .NET developer and loves sharing his knowledge about Blazor and other .NET topics with the community.

