Deploying ASP.NET Core Applications with Docker—Part 2

Due to its flexibility and simplicity, Docker makes it easy to manage applications and their dependencies. In this second part about Docker with ASP.NET Core, we will see how to add a SQL Server database to the application and how to run it in a Docker container using Docker Compose.
In the first part, we saw an introduction to Docker, understanding how it works and its advantages compared to virtual machines. In addition, we created our first Dockerfile and executed the commands to deploy an ASP.NET Core MVC application running in a Docker container.
In that example, we used the .NET in-memory storage resources as the database, but in real-world scenarios, it is common to use SQL databases such as SQL Server and MySQL. And that is what we will cover in this post.
Using the application from the last post, we will create a connection to an SQL Server database and create a container for it. In addition, we will see how to configure Docker to execute Entity Framework Core commands when deploying a new Docker image of the application.
Configuring the Base Application
In this post, we will take advantage of the application created in the first part, just modifying what is necessary. So, you can use the following Git command to download the base application via HTTPS. If you prefer, you can access the remote repository at this link: https://github.com/zangassis/reminder-list.
git clone https://github.com/zangassis/reminder-list.git
Then, let’s add the Entity Framework Core and SQL Server dependencies to the application. Open the project with your code editor and click on the file with the .csproj extension. Add the following code to it:
<PackageReference Include="Microsoft.EntityFrameworkCore .Design" Version="9.0.0">
      <IncludeAssets>runtime; build; native; contentfiles; analyzers; buildtransitive</IncludeAssets>
      <PrivateAssets>all</PrivateAssets>
    </PackageReference>
    <PackageReference Include="Microsoft.EntityFrameworkCore .SqlServer" Version="9.0.0" />
Now let’s create a class to execute the migration commands and create the database and tables when the application is run in the docker container.
Inside the Data folder, add the following class:
- DatabaseManagementService
using Microsoft.EntityFrameworkCore;
using Microsoft.EntityFrameworkCore.Infrastructure;
using Microsoft.EntityFrameworkCore.Storage;

namespace ReminderList.Data
{
    public static class DatabaseManagementService
    {
        public static void MigrationInitialisation(IApplicationBuilder app)
        {
            using (var serviceScope = app.ApplicationServices.CreateScope())
            {
                var context = serviceScope.ServiceProvider.GetRequiredService<TodoContext>();

                if (!context.Database.GetService<IRelationalDatabaseCreator>().Exists())
                {
                    context.Database.Migrate();
                }
            }
        }
    }
}
Here, the CreateScope() method creates a scope to access dependent services registered in the IServiceCollection, such as the ApplicationDbContext. Then, the serviceScope.ServiceProvider.GetRequiredService<ApplicationDbContext>() retrieves an instance of ApplicationDbContext, which is the class responsible for interacting with the database. Finally, if the database does not exist, the Migrate() method applies all pending migrations, updating the database schema according to the definitions of the migrations that were generated in the project.
Now we no longer need the database memory configuration, but rather the SQL Server configuration. So, open the Program.cs file and remove the following settings:
builder.Services.AddDbContext<TodoContext>(options =>
	options.UseInMemoryDatabase("TodoList"));
And then add the following:
var connectionString = builder.Configuration.GetConnectionString("DefaultConnection");

builder.Services.AddDbContext<TodoContext>(options =>
    options.UseSqlServer(connectionString));
And right after the code snippet app.UseAuthorization();, add the call to the MigrationInitialisation() method that will execute the migration commands when the application is built in the Docker container:
DatabaseManagementService.MigrationInitialisation(app);
Now let’s add the connection string in the appsettings.json file. Open the appsettings.json file and add the following:
"ConnectionStrings": {
    "DefaultConnection": "Server=mssql-server,1433;Initial Catalog=TodoListDb;User ID=SA;Password=8/geTo'7l0f4;TrustServerCertificate=true"
  },
Here we define the SQL Server database settings, such as database name, user ID and password, among others. These settings will be the same ones used when we create the SQL Server Docker container—so for the application to be able to connect to the database in the container, these credentials need to be configured correctly.
Creating the Docker Compose File
Docker Compose is a tool that allows you to define and run applications in multiple Docker containers.
It uses a configuration file, commonly called docker-compose.yml, where the services that make up the application are configured, such as APIs, databases, logging services, etc.
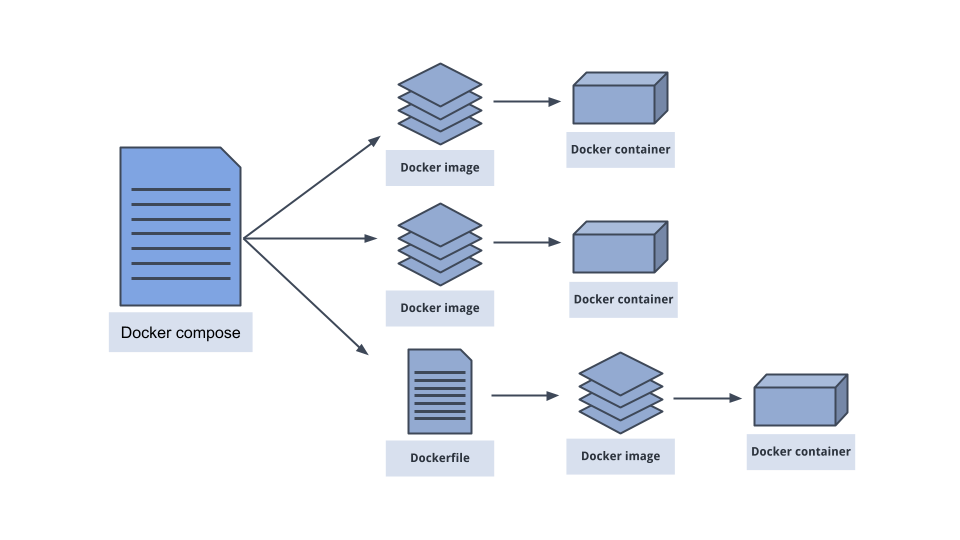
Compose is useful in scenarios where it is necessary to manage multiple containers. For example, in a backend application in ASP.NET Core, the first container would be for the application executable, and the second would be for the database (e.g. SQL Server or PostgreSQL). And a third container for additional tools (e.g., Redis, Nginx, etc.).
Instead of creating a Dockerfile for each service, we can create a Docker Compose for all services.
In the scenario of the post, we will need a container for the web application and a second container for the SQL Server database. So, in the project root folder, create a new file called docker-compose.yml and inside it add the code below:
version: '3'
services:
  mssql-server:
    image: mcr.microsoft.com/mssql/server:2022-latest
    environment:
      ACCEPT_EULA: "Y"
      SA_PASSWORD: "8/geTo'7l0f4"
      MSSQL_PID: Express
    ports:
      - "1433:1433"
    volumes:
        - ./sqlserver-data/volumes/sqlserver:/var/opt/mssql/data
  todo-app:
    build: .
    environment:
      ASPNETCORE_ENVIRONMENT: "Development"
    ports:
      - "8090:80"
Now, let’s analyze each part of this code.
version: '3': Defines the version of Docker Compose to be used. In this case, Version 3 is used for modern projects.
services: Contains the definition of the services that will be executed.
mssql-server: Configures a container with the Microsoft SQL Server database.
image: Uses the latest official SQL Server 2022 image available in the Microsoft Container Registry.
environment: Defines environment variables to configure the SQL Server.
ACCEPT_EULA: "Y": Accepts the SQL Server license terms.
SA_PASSWORD: "8/geTo'7l0f4" Defines the system administrator (SA) password. Following SQL Server security rules (minimum of 8 characters, with uppercase letters, lowercase letters, numbers and special characters).
MSSQL_PID: "Express": Configures SQL Server to run in the free Express edition.
ports: Maps port 1433 of the container to port 1433 of the host.
volumes: ./sqlserver-data/volumes/sqlserver:/var/opt/mssql/data: Mounts a persistent volume on the host to store SQL Server data, storing the data in the local folder and mapping it to the
/var/opt/mssql/datadirectory inside the container.todo-app: Configures the ASP.NET Core application.
build: Indicates that the container will be built from the current directory using the Dockerfile in this directory.
environment-: Sets environment variables for the application.
ASPNETCORE_ENVIRONMENT: "Development": Sets the application environment as Development.
ports: Maps port 80 of the container to port 8090 of the host, allowing access to the application via http://localhost:8090.
Running Compose Commands
Before running the command to persist the docker-compose file, it is necessary to generate the EF Core migrations files, so that when the container is created, the database and tables are also created.
So, open a terminal in the root of the application and run the following command:
dotnet ef migrations add InitialCreate
Now we can run the docker command that will create the containers. In the terminal, run the following command:
docker compose up --build
Let’s explain each command:
Rebuild Container Images: The --build parameter forces Docker Compose to rebuild the container images.
Upload Services: The docker-compose up command starts the services defined in the docker-compose.yml file. It creates and initializes the service containers, connecting them according to the defined network configuration.
If everything goes well, you can check the images and containers created on the docker desktop.
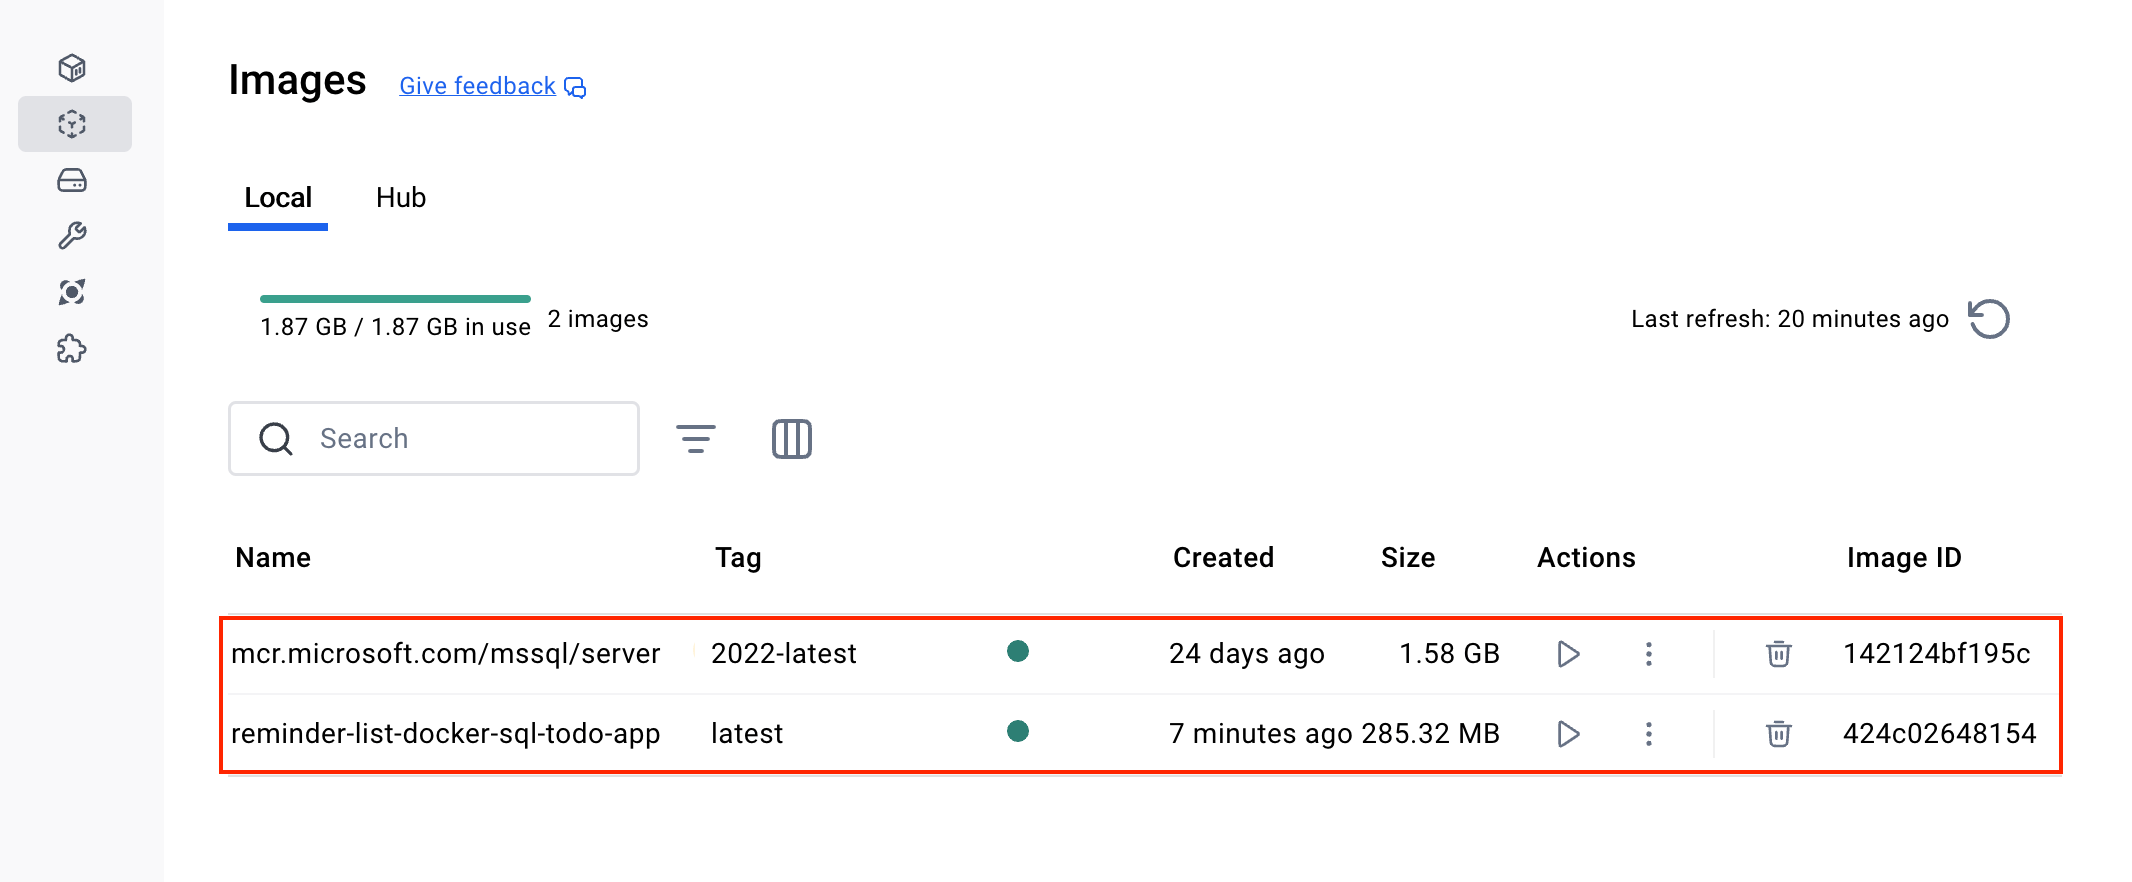
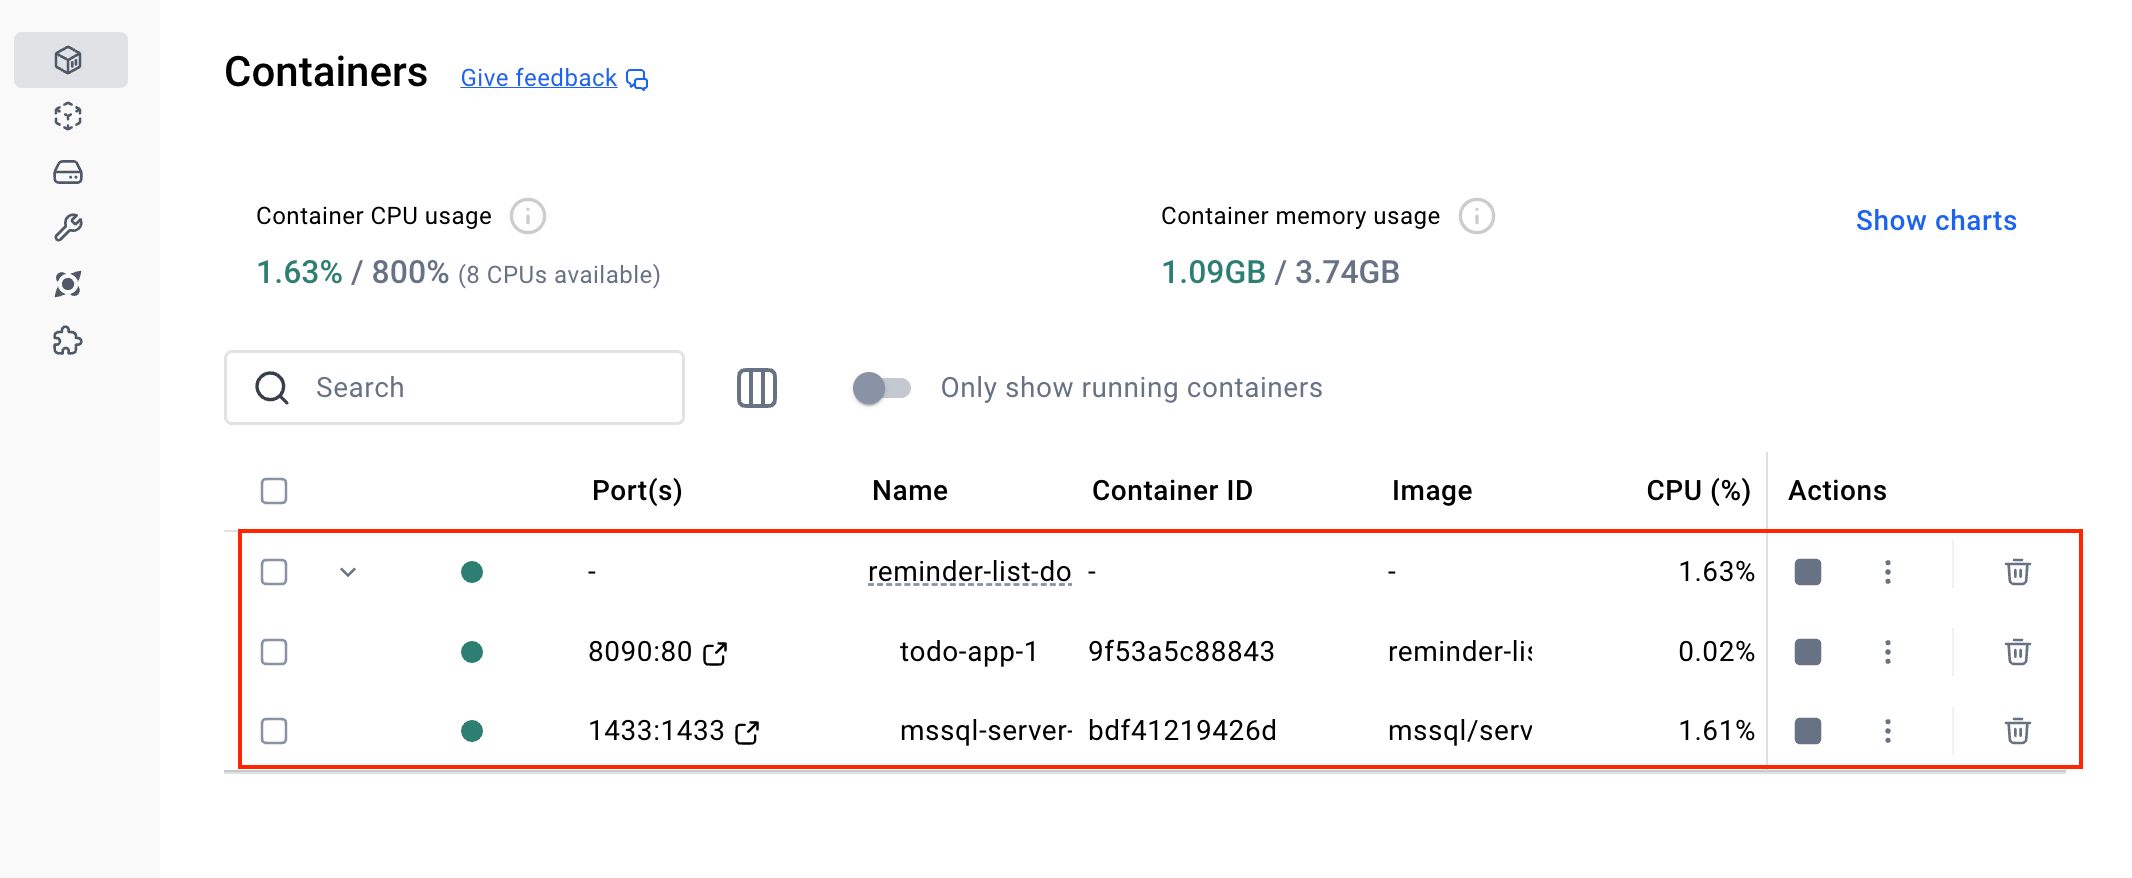
Note that there is a container for the SQL Server database and another container for the application, so if we had more applications, they could all access the same database that is running in the Docker container.
Testing the Application
Now you can access the application in the browser to check if everything is working correctly. So, in the browser, access the address: https://localhost:8090/Todo and try to create a new task:
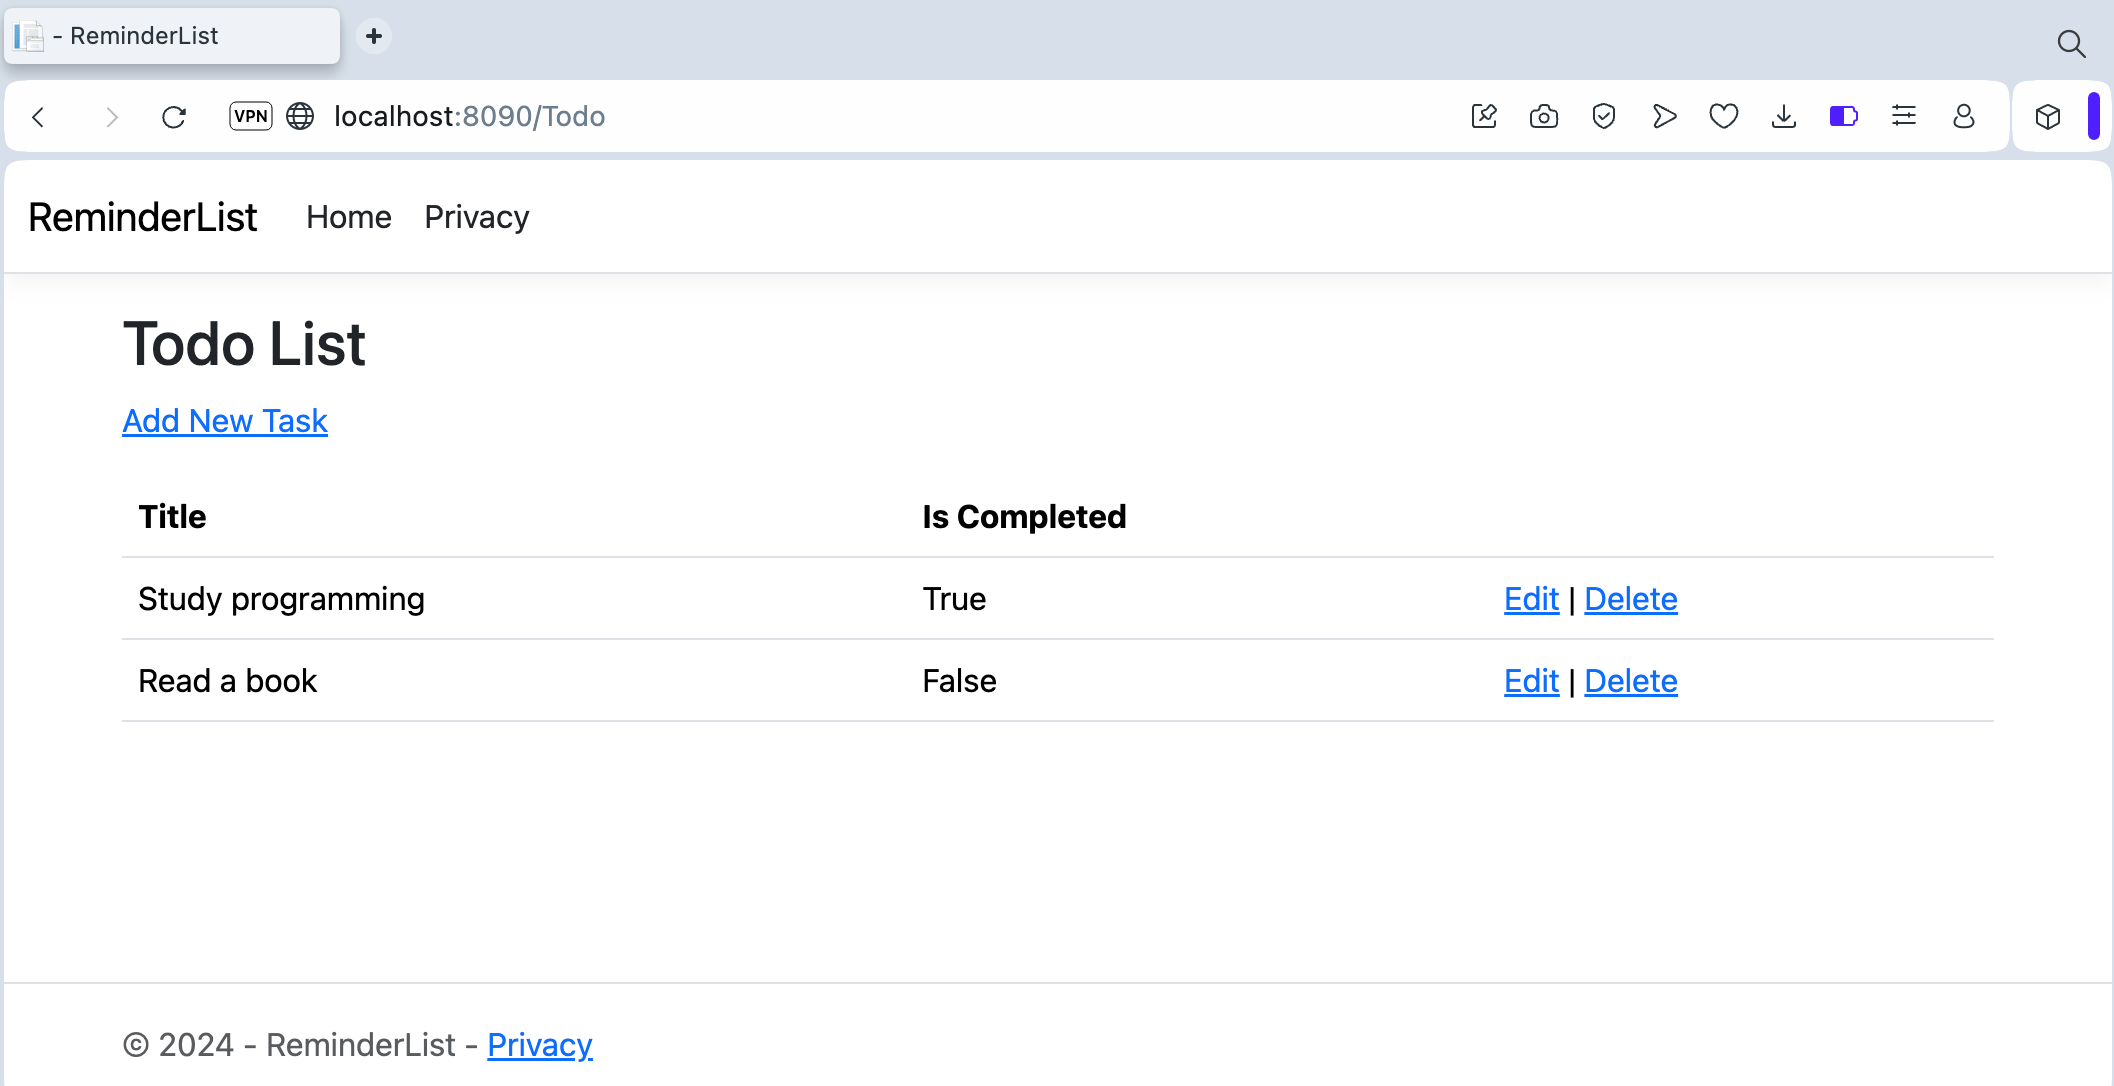
You can access the source code with the post modifications in this GitHub repository: Source code.
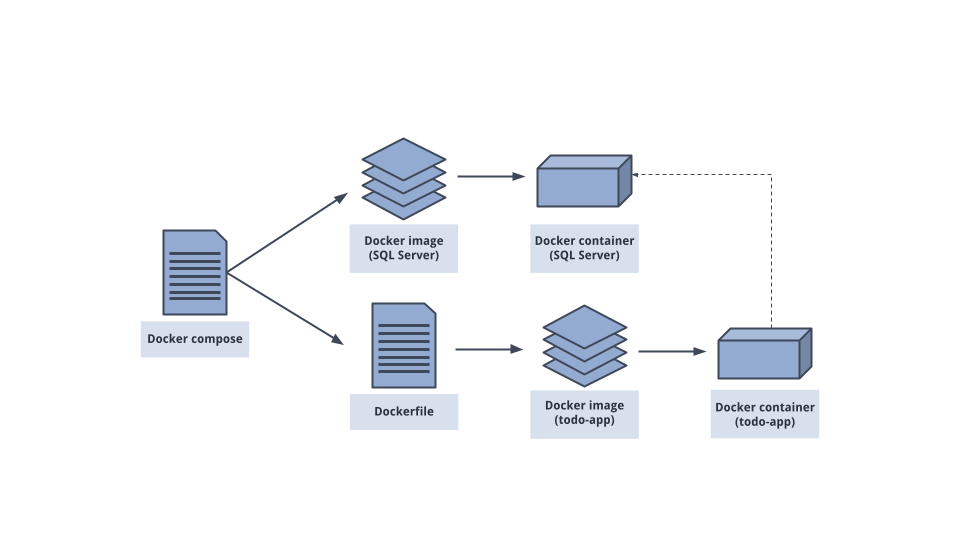
Now the web application we created no longer accesses the in-memory database. Instead it accesses the SQL Server that has an instance running in the container. The image below demonstrates a flow of the example created in the post where docker compose creates an image and container for the SQL Server, in addition to using the Dockerfile to create the image and container of the ASP.NET Core application.
Conclusion
Using Docker to manage applications enables agility and efficiency in system development and deployment. With a few configurations and commands, developers can quickly deploy applications in isolated environments, regardless of the operating system or machine configuration. In addition, Docker makes it easier to scale and manage dependencies, allowing teams to focus more on developing features and less on environment configuration and potential issues during this process.
In this post, we saw how to improve a project that already used Docker. In this example, we created Docker Compose, which allows the configuration of several services, without the need for a Docker file per service. Thus, we integrated the application with the SQL Server database that was also running in a Docker container. We also checked details on how to configure EF Core to execute the migration commands when the container was started.
You can use Docker to speed up the development, testing and deployment of web applications.


