
Using Angular in a Windows Forms Application

Summarize with AI:
See how to use Kendo UI for Angular components in Telerik UI for WinForms applications to exchange communication and events.
In this post, I’ll demonstrate how to use Progress Kendo UI for Angular components in Telerik UI for WinForms applications. You’ll learn the pitfalls and how to implement communication to Angular from WinForms and get back events from Angular.
I’m sharing the complete source code, which is fully functional using Telerik UI, .NET 8 and Angular, on my GitHub.
Note: This post was written before the launch of .NET 9 or Angular 19, but don’t forget you can get started with both of those new versions. 😊
If You Are Asking Yourself: Why Would I Do This?
There are several scenarios where this could be applied:
- Start the migration from legacy WinForms applications to Angular
- Integration from local resources (on-premises databases and other WinForms resources)
- Build lightweight UI applications in complex WinForms apps
- Build WinForms applications with the look and feel of a web application
- Execute distributed UIs running in Docker, IIS or Cloud
- Update the UI without updating the WinForms app client application
These transition scenarios from your legacy applications can help you use the active production resources while developing the new service/application. A hybrid solution can keep the current WinForms while empowering developers to build the client-side application.
The sky is the limit.
Let’s Do It
To replicate this sample, you must create a WinForms app and an Angular project to host the desired controls. If you are integrating with a legacy WinForms app, you just need to create the Angular project.
Install the last version of Angular on the terminal prompt:
1. npm install -g @angular/cli.
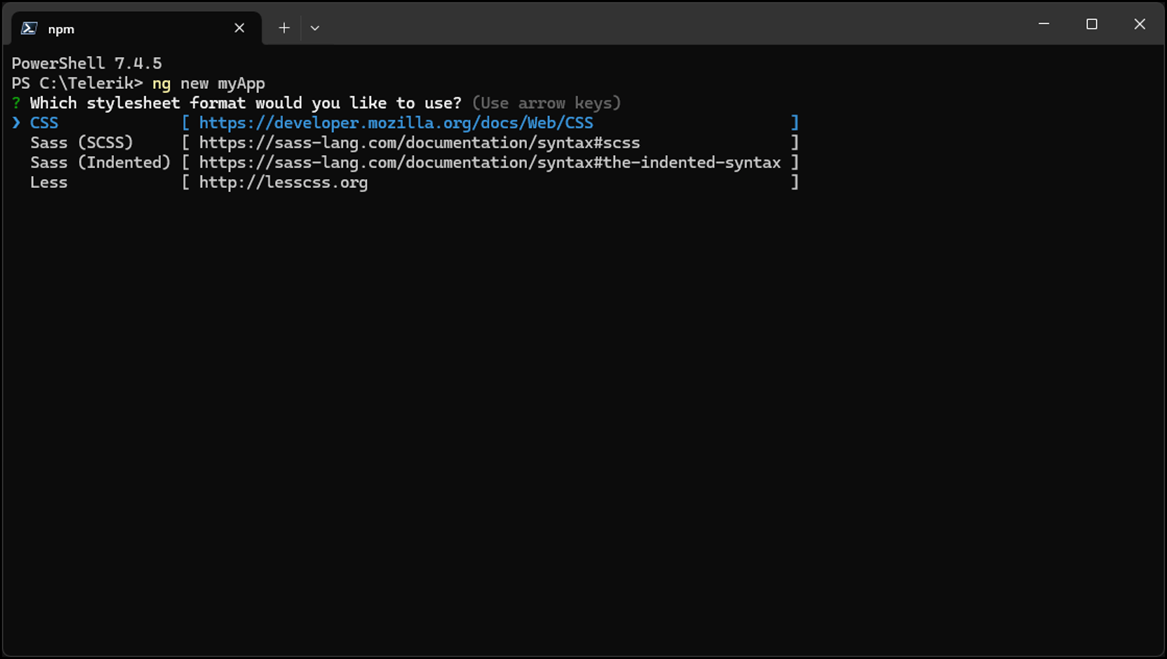
Enter in a target directory for example C:\Telerik, and create the new project:
1. ng new my-app
Choose the options for CSS:
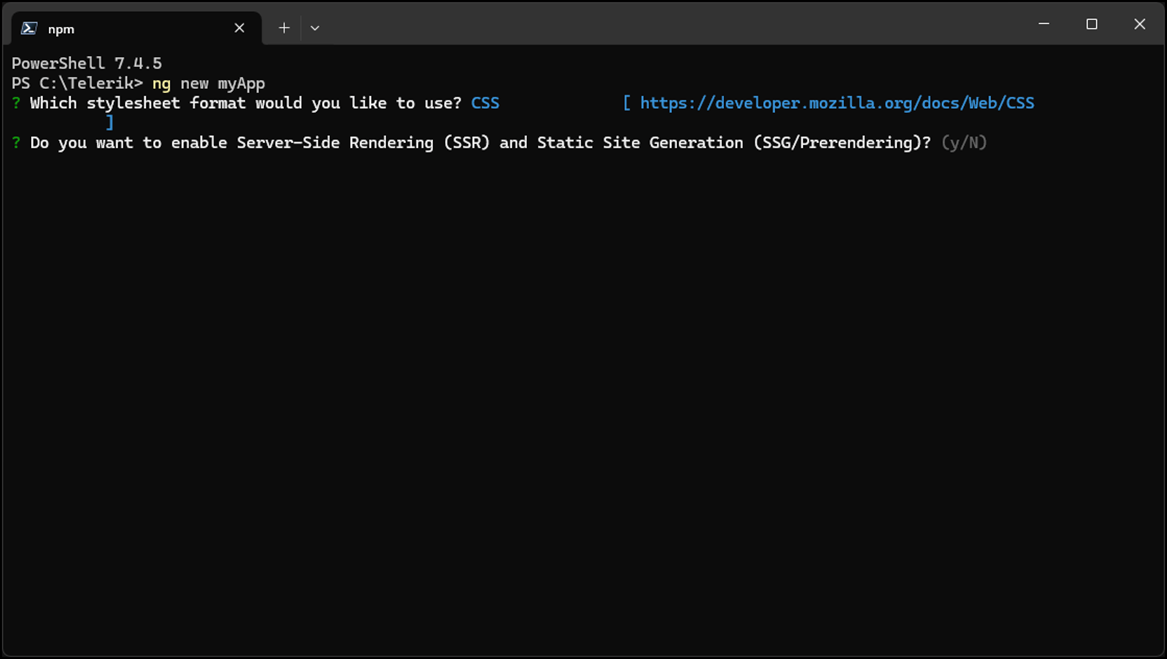
Enable or not SSR (Server-Side Rendering) or SSG (Static Site Generation). I prefer SSG for small applications to avoid constant network traffic:
Wait for the installation to finish:
About the Objective of This Application Sample
For this case, I’m demonstrating using Telerik UI for an Angular Chart control and treating the event click on WinForms.
Note: Progress Telerik builds an environment on the web, which is fantastic; thousands of samples are available online to get started on Telerik technologies. In this case, I’m using part of the code from this post.
Kendo UI for Angular App
Follow the steps to configure and use the controls from WinForms.
- We are going to be using Kendo UI components, specifically the Kendo UI for Angular Pie Chart. Before creating the chart and its functionality, let’s install it so our app has access to it. At the root of our
my-appproject, type this installation command:
ng add @progress/kendo-angular-chartsThere are multiple things this command does for us (like install the charts and its dependencies. Read more about not only that command but other special install cases in the Kendo UI docs.
Now, add kendo-angular-charts to your main.
It is necessary to create the pages and component hosts and add an interface (verb) and a CustomEvent to return data.
Start creating the pages with the controls you like to use. Let’s generate an angular component called
graph-controlto house these, the graph-control will host the Angular chart component:ng g c graph-control- Add your new component to the app.routes.ts the route for the pages that hosts the components:
import { Routes } from '@angular/router';
import { GraphControlComponent } from './graph-control/graph-control.component';

export const routes: Routes = [
    {
     path: 'graph-control',
     component: GraphControlComponent
    }
];
- Create the component to host the control with the command line. In this sample, we are currently demonstrating just the chart-component:
1. ng g c win-chart
- Customize the control.
Add the interface that will be used to exchange the data (receiveData) integrated with WinForms. I call these verbs because you can add more than one interface to transfer data:
1.	declare global {
2.	  interface Window {
3.	    receiveData: (data: any) => void;
4.	  }
5.	}
Now, right inside our WinChart Component, we need to create a public winFormsData: any = null; variable to hold our data in.
- Next, let’s incorporate local storage to preserve our data. We can use it to store our data between page refreshes; there is nothing more infuriating to a user than losing progress. In our init function, we can get the data from local storage and update our
winFormsDatavalue ifsavedDataexists here.
1.	public winFormsData: any = null;
2.	 constructor() {
3.	    window.receiveData = (data: any) => {
4.	      this.winFormsData = data;
5.	      localStorage.setItem('winFormsData', JSON.stringify(data));
6.	    };
7.	  }
8.
9.	  ngOnInit() {
10.	    const savedData = localStorage.getItem('winFormsData');
11.	    if (savedData) {
12.	      this.winFormsData = JSON.parse(savedData);
13.	    }
14.	  }
Add a click event for the chart to use in the component.html:
1.	  onSeriesClick(event: SeriesClickEvent): void {
2.	    const category = event.category;
3.	    const value = event.value;
4.
5.	    console.log('Category:', category);
6.	    console.log('Value:', value);
7.
8.	    const message = JSON.stringify({ category, value });
9.
10.	    // Create a new custom event
11.	    const eventClick = new CustomEvent('MyClick', {
12.	      detail: { message: message }, // Pass any necessary data
13.	    });
14.
15.	    window.dispatchEvent(eventClick);
16.	  }
Tip: This is a pitfall; pay attention to the JSON you will return. The incorrect format for the JSON will crash the delivery:
1. const message = JSON.stringify({ category, value });
Remove the default HTML from win-chart.component.html and let’s go ahead and add a Kendo UI Chart that will use that series click we just made.
1.	<div *ngIf="winFormsData === null">Loading....</div>
2.	// check the var winFormsData
3.
4.	<div *ngIf="winFormsData !== null">
5.	  <kendo-chart
6.	    (seriesClick)="onSeriesClick($event)">
7.	    <kendo-chart-title
8.	      color="black"
9.	      font="12pt sans-serif"
10.	      text="WinForms x Angular - Data integration"
11.	    >
12.	    </kendo-chart-title>
13.	    <kendo-chart-legend position="top"></kendo-chart-legend>
14.	    <kendo-chart-series>
15.	      <kendo-chart-series-item
16.	        [data]="winFormsData"
17.	        [labels]="{ visible: true, content: label}"
18.	        [type]="typeChart"
19.	        categoryField="name"
20.	        colorField="color"
21.	        field="value">
22.	      </kendo-chart-series-item>
23.	    </kendo-chart-series>
24.	  </kendo-chart>
25.	</div>
On the graph-control page, add the HTML to bind:
1. <app-win-chart></app-win-chart>
To speed us along, I’ll supply the complete file for win-chart.component.ts (it is also available on my GitHub repository):
1.	import { Component } from '@angular/core';
2.	import { ChartsModule, LegendLabelsContentArgs, SeriesClickEvent, SeriesType } from "@progress/kendo-angular-charts";
3.	import { CommonModule } from '@angular/common';
4.
5.	declare global {
6.	  interface Window {
7.	    receiveData: (data: any) => void;
8.	  }
9.	}
10.
11.	@Component({
12.	  selector: 'app-win-chart',
13.	  standalone: true,
14.	  imports: [ChartsModule, CommonModule],
15.	  templateUrl: './win-chart.component.html',
16.	  styleUrls: ['./win-chart.component.css']
17.	})
18.	export class WinChartComponent {
19.	  public winFormsData: any = null;
20.	  public typeChart: SeriesType = "pie";
21.
22.	  constructor() {
23.	    window.receiveData = (data: any) => {
24.	      this.winFormsData = data;
25.	      localStorage.setItem('winFormsData', JSON.stringify(data));
26.	    };
27.	  }
28.
29.	  ngOnInit() {
30.	    const savedData = localStorage.getItem('winFormsData');
31.	    if (savedData) {
32.	      this.winFormsData = JSON.parse(savedData);
33.	    }
34.	  }
35.
36.	  public label(args: LegendLabelsContentArgs): string {
37.	    return `${args.dataItem.name}`;
38.	  }
39.
40.	  onSeriesClick(event: SeriesClickEvent): void {
41.	    const category = event.category;
42.	    const value = event.value;
43.
44.	    console.log('Category:', category);
45.	    console.log('Value:', value);
46.
47.	    const message = JSON.stringify({ category, value });
48.
49.	    // Create a new custom event
50.	    const eventClick = new CustomEvent('MyClick', {
51.	      detail: { message: message }, // Pass any necessary data
52.	    });
53.
54.	    window.dispatchEvent(eventClick);
55.	  }
56.
57.	}
Now that your Angular app is ready, let’s start using the WinForms app.
Configuring the WinForms App
In the WinForms app, I isolated the host component WebView2 on a UserControl, AngularWebControl.cs, so all components have the same UserControl base and share the same behavior.
The WebView2 is necessary to hold the Angular application from the URL and interact with the WinForms.
This is the solution’s files from the C# project will looks like this:
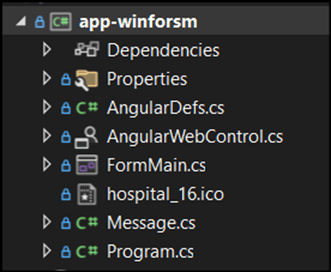
The AngularDefs.cs hosts the definitions that hold the Angular project in a single place. This also could be environment variables to avoid hard-coded data:
1.	namespace app_winforsm;
2.	internal static class AngularDefs
3.	{
4.	    // URL of the Angular application
5.	    public const string Url = "https://aw.jsmotta.com/";
6.
7.	    // Route to the graph component
8.	    public const string RouteGraph = "graph-control";
9.
10.	    // Verb to receive data in the Angular component
11.	    public const string ChartVerb = "receiveData";
12.	}
The AngularWebControl.cs holds the interface’s tasks. I added some explanations to the code below. It defines the interface with the component, reads the click event, and passes it to the event handler.
1.	using Microsoft.Web.WebView2.Core;
2.	using Microsoft.Web.WebView2.WinForms;
3.	using System.Text.Json;
4.	using Telerik.WinControls.UI;
5.
6.	namespace app_winforsm;
7.	internal partial class AngularWebControl : UserControl
8.	{
9.	    // WebView Control
10.	    private WebView2? _webView;
11.
12.	    // Event to handle chart item click - it could be only OnItemClick
13.	    public event EventHandler? OnChartItemClick;
14.
15.	    // The data to be passed to the Angular component
16.	    private dynamic? Data { get; set; }
17.
18.	    // a label to show the title of the control
19.	    // in a real-world scenario, we can extend this component and add other controls
20.	    private RadLabel? Title { get; set; }
21.
22.	    public AngularWebControl()
23.	    {
24.	        InitializeComponent();
25.	    }
26.	    public async void LoadData(string title, dynamic data)
27.	    {
28.	        if (Title == null)
29.	        {
30.	            Title = new RadLabel
31.	            {
32.	                Text = title,
33.	                Dock = DockStyle.Top,
34.	                Width = this.Width,
35.	                AutoSize = true,
36.	                Font = new Font("Arial", 12, FontStyle.Bold),
37.	                ThemeName = "Windows11"
38.	            };
39.
40.
41.	            this.Controls.Add(Title);
42.
43.	            Title.MouseUp += Title_MouseUp;
44.	        }
45.
46.	        this.Title.Text = title;
47.
48.	        if (_webView == null)
49.	        {
50.	            _webView = new WebView2
51.	            {
52.	                Visible = true,
53.	                Dock = DockStyle.Fill
54.	            };
55.
56.	            this.Controls.Add(_webView);
57.
58.	            var userDataFolder1 = Path.Combine(Environment.GetFolderPath(Environment.SpecialFolder.LocalApplicationData), $"AngularWinFormsApp_{this.Name}");
59.
60.	            var environment1 = await CoreWebView2Environment.CreateAsync(userDataFolder: userDataFolder1);
61.
62.	            // The environment is created to avoid loss of data in the session
63.	            await _webView.EnsureCoreWebView2Async(environment1);
64.
65.
66.	            _webView.CoreWebView2.NavigationCompleted += WebView_NavigationCompleted;
67.
68.	            // Event to receive data from Angular
69.	            _webView.CoreWebView2.WebMessageReceived += CoreWebView2_WebMessageReceived;
70.
71.	            _webView.CoreWebView2.Navigate($"{AngularDefs.Url}{AngularDefs.RouteGraph}");
72.
73.	            if (OnChartItemClick != null)
74.	            {
75.	                // This is the trick to receive data from the Angular component
76.	                await _webView.CoreWebView2.ExecuteScriptAsync(@"
77.	                    window.addEventListener('MyClick', function(event) {
78.	                        window.chrome.webview.postMessage(event.detail.message);
79.	                    });
80.	                ");
81.	            }
82.	        }
83.
84.	        // Send the data to the Angular component
85.	        this.Data = data;
86.	    }
87.
88.	    private void Title_MouseUp(object? sender, MouseEventArgs e)
89.	    {
90.	        if (e.Button == MouseButtons.Right)
91.	        {
92.	            // An easter egg to show the WebView console
93.	            // when pressing right click on the RadLabel
94.	            ShowWebViewConsole();
95.	        }
96.	    }
97.
98.	    // Event handler to handle messages received from the WebView2
99.	    private void CoreWebView2_WebMessageReceived(object? sender, CoreWebView2WebMessageReceivedEventArgs e)
100.	    {
101.	        // Retrieve the message from the event
102.	        var message = e.TryGetWebMessageAsString();
103.
104.	        // Display the message or perform any action
105.	        OnChartItemClick?.Invoke(message, EventArgs.Empty);
106.	    }
107.	    private async void WebView_NavigationCompleted(object? sender, CoreWebView2NavigationCompletedEventArgs e)
108.	    {
109.	        if (_webView == null) return;
110.
111.	        _webView.Visible = true;
112.
113.	        if (!e.IsSuccess)
114.	        {
115.	            // Return a custom messsage based on the error to avoid default Webview error page
116.	            switch (e.WebErrorStatus)
117.	            {
118.
119.	                case CoreWebView2WebErrorStatus.ConnectionAborted:
120.	                    ShowErrorMessage("Connection refused. Please make sure the server is running and try again.");
121.	                    break;
122.	                case CoreWebView2WebErrorStatus.Unknown:
123.	                case CoreWebView2WebErrorStatus.CertificateCommonNameIsIncorrect:
124.	                case CoreWebView2WebErrorStatus.CertificateExpired:
125.	                case CoreWebView2WebErrorStatus.ClientCertificateContainsErrors:
126.	                case CoreWebView2WebErrorStatus.CertificateRevoked:
127.	                case CoreWebView2WebErrorStatus.CertificateIsInvalid:
128.	                case CoreWebView2WebErrorStatus.ServerUnreachable:
129.	                case CoreWebView2WebErrorStatus.Timeout:
130.	                case CoreWebView2WebErrorStatus.ErrorHttpInvalidServerResponse:
131.	                case CoreWebView2WebErrorStatus.ConnectionReset:
132.	                case CoreWebView2WebErrorStatus.Disconnected:
133.	                case CoreWebView2WebErrorStatus.CannotConnect:
134.	                case CoreWebView2WebErrorStatus.HostNameNotResolved:
135.	                case CoreWebView2WebErrorStatus.OperationCanceled:
136.	                case CoreWebView2WebErrorStatus.RedirectFailed:
137.	                case CoreWebView2WebErrorStatus.UnexpectedError:
138.	                case CoreWebView2WebErrorStatus.ValidAuthenticationCredentialsRequired:
139.	                case CoreWebView2WebErrorStatus.ValidProxyAuthenticationRequired:
140.	                default:
141.	                    ShowErrorMessage("An error occurred while loading the page.");
142.	                    break;
143.	            }
144.	            return;
145.	        }
146.
147.	        var jsonData = JsonSerializer.Serialize(Data);
148.
149.	        // Here is the connection with the interface (verb) defined in the Angular component
150.	        var script = $"window.{AngularDefs.ChartVerb}({jsonData});";
151.
152.	        await _webView.CoreWebView2.ExecuteScriptAsync(script);
153.	    }
154.
155.	}
The Message.cs is the model for the click event interact from the Angular app.
Here is the use case for the controls in FormMain.cs. I added one control dynamically and another using drag-and-drop from the Toolbox. It is important to note that a distinct property name is needed to avoid collisions on the WebView2 sessions; this is a pitfall.
I use mocked data in this sample, but you will probably read from a data source in real-world applications.
1.	using System.Text.Json;
2.	using Telerik.WinControls;
3.	using Telerik.WinControls.UI;
4.
5.	namespace app_winforsm;
6.
7.	public partial class FormMain : RadForm
8.	{
9.	    private readonly AngularWebControl? _angularWebControl;
10.
11.	    public FormMain()
12.	    {
13.	        InitializeComponent();
14.
15.	        // Load the AngularWebControl programatically
16.
17.	        _angularWebControl = new AngularWebControl { Name = "_angularWebControl" };
18.	        _angularWebControl.Dock = DockStyle.Fill;
19.
20.	        splitPanel1.Controls.Add(_angularWebControl);
21.
22.	        // Subscribe to the OnChartItemClick event
23.	        _angularWebControl.OnChartItemClick += AngularWebControl_OnChartItemClick;
24.
25.	        LoadData();
26.	    }
27.
28.	    private void AngularWebControl_OnChartItemClick(object? sender, EventArgs e)
29.	    {
30.	        if (sender is null)
31.	            return;
32.
33.	        var message =
34.	            JsonSerializer.Deserialize<Message>(sender.ToString() ?? throw new Exception("Data is not a json."));
35.
36.	        RadMessageBox.ThemeName = "Windows11";
37.	        RadMessageBox.Show($"You clicked on {message.Category} with value {message.Value}", "Chart Item Clicked",
38.	            MessageBoxButtons.OK, RadMessageIcon.Info);
39.	    }
40.
41.	    private void LoadData()
42.	    {
Note: In a production project, you will load the data from your repository!
43.
44.	        var data = new[]
45.	        {
46.	            new { name = "Gastroenteritis", value = 40, color = "red" },
47.	            new { name = "Appendicitis", value = 25, color = "blue" },
48.	            new { name = "Cholecystitis", value = 15, color = "green" },
49.	            new { name = "Pancreatitis", value = 10, color = "yellow" },
50.	            new { name = "Diverticulitis", value = 10, color = "orange" }
51.	        };
52.
53.	        _angularWebControl?.LoadData("Common gastro deseases in hospitals", data);
54.
55.	        var dataAges = new[]
56.	        {
57.	            new { name = "0-10", value = 1, color = "red" },
58.	            new { name = "11-20", value = 10, color = "blue" },
59.	            new { name = "21-30", value = 20, color = "green" },
60.	            new { name = "31-40", value = 25, color = "yellow" },
61.	            new { name = "41-50", value = 15, color = "orange" },
62.	            new { name = "51-60", value = 20, color = "purple" },
63.	            new { name = "61-70", value = 8, color = "brown" },
64.	            new { name = "71+", value = 7, color = "pink" }
65.	        };
66.
67.	        this.angularWebControl1.LoadData("Patiant ages in gastro deseases", dataAges);
68.	    }
69.	}
And This Is the Result!
As you can see, the two charts share the same interface and UserControl. You can’t see them but are in a distinct web session. The session is isolated to preserve data and for security, the same UserControl could be using distinct credentials according to the URL passed as parameter.

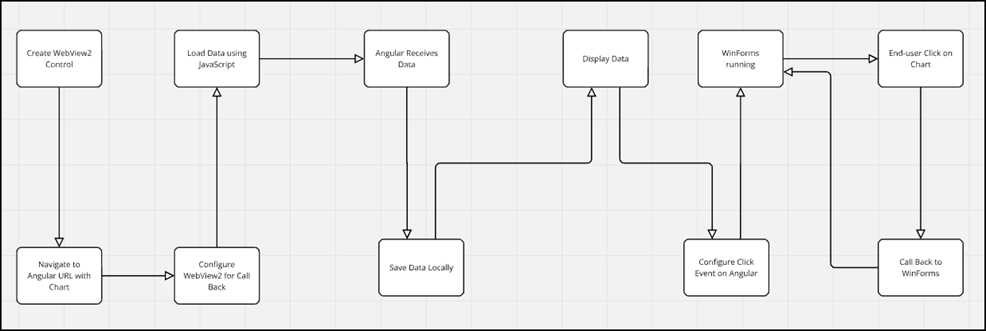
Workflow of This Sample
In the picture below, we can “see” the flow of coding and on execution until the callback when the end-user clicks on the chart, download the source code from GitHub and give it a try.
Conclusion
The interoperability isn’t complex, and this may leverage a mixed team and design better interfaces with low memory consumption than the classical WinForms apps.
In edge computing, I imagine the interface running on a server near the end user, even a local docker/Azure/AWS near the client machine, avoiding long web traffic.
Download the code and see how it works and all the possibilities this feature can bring to your business and services.
Feel free to use the code or contact me on LinkedIn. Also, remember that Progress Telerik offers free support during the evaluation period.
References

Jefferson S. Motta
Jefferson S. Motta is a senior software developer, IT consultant and system analyst from Brazil, developing in the .NET platform since 2011. Creator of www.Advocati.NET, since 1997, a CRM for Brazilian Law Firms. He enjoys being with family and petting his cats in his free time. You can follow him on LinkedIn and GitHub.
Related Posts
Comments
All articles
Topics
Web MobileMobile
Desktop
Design
Productivity
People
