
Examining APIs in .NET MAUI Community Toolkit Essentials

Summarize with AI:
In this article, you will learn about .NET MAUI Community Toolkit Essentials, a set of cross-platform APIs that allow you to perform common operations easily. Let’s get started!
Examining .NET MAUI Community Toolkit Essentials
As mentioned in the introduction, .NET MAUI Community Toolkit Essentials (hereafter Essentials) is a cross-platform API that works with any .NET MAUI application and can be accessed through shared code, regardless of how the graphical interface was created.
The available APIs are:
- AppTheme Resources: Allows creating theme-adapted resources that automatically change with the device theme.
- Badge: Allows setting a number on the Badge of the application’s icon on the home screen.
- FolderPicker: Allows selecting a folder from the device.
- FileSaver: Allows saving a file to the device’s file system.
- SpeechToText: Converts voice from a recording to text.
Let’s see how to use the above APIs in a practical project.
Creating a Practice Project
We are going to create an application that uses Essentials functionalities. To do this, follow these steps:
- Create a project by selecting the .NET MAUI app template without including the sample content.
- Install Progress Telerik UI for .NET MAUI controls in the project by following the installation guide. In my case, I prefer using NuGet package installation. Telerik controls allow us to easily customize the application’s appearance.
- Install the
CommunityToolkit.MauiandMicrosoft.Maui.Controls.Compatibilitypackages in your .NET MAUI project. - In the
MauiProgram.csfile, add calls to theUseTelerikandUseMauiCommunityToolkitmethods as follows:
public static class MauiProgram
{
    public static MauiApp CreateMauiApp()
    {
        var builder = MauiApp.CreateBuilder();
        builder
            .UseMauiApp<App>()
            .UseMauiCommunityToolkit()
            .UseTelerik()
            ...

        return builder.Build();
    }
}
- In the
MainPage.xamlfile, replace the ContentPage content with the following:
<ContentPage ...
    xmlns:telerik="clr-namespace:Telerik.Maui.Controls;assembly=Telerik.Maui.Controls"
    xmlns:toolkit="http://schemas.microsoft.com/dotnet/2022/maui/toolkit"
    Shell.NavBarIsVisible="False">

    <ScrollView>
        <VerticalStackLayout
            Padding="20"
            HorizontalOptions="Center"
            Spacing="20"
            VerticalOptions="Center">
            <Label
                FontAttributes="Bold"
                FontSize="24"
                HorizontalOptions="Center"
                Text="My Voice Diary"
                TextColor="{AppThemeBinding Light=Black,
                                            Dark=#DDD}" />
            <Label
                FontSize="14"
                HorizontalTextAlignment="Center"
                Opacity="0.8"
                Text="Press 'Start Recording' and dictate your diary entry. Then, press 'Stop Recording' to generate the transcription."
                TextColor="{AppThemeBinding Light=Black,
                                            Dark=#DDD}" />
            <telerik:RadBorder
                x:Name="frmTranscription"
                Padding="15"
                BorderColor="#CCCCCC"
                BorderThickness="2"
                CornerRadius="10">
                <VerticalStackLayout Spacing="5">
                    <Label
                        FontAttributes="Bold"
                        FontSize="16"
                        Text="Transcription:"
                        TextColor="{AppThemeBinding Light=Black,
                                                    Dark=#DDD}" />
                    <Label
                        x:Name="lblDiary"
                        FontSize="14"
                        Text="You haven't recorded anything yet..."
                        TextColor="{AppThemeBinding Light=#333333,
                                                    Dark=#DDD}" />
                </VerticalStackLayout>
            </telerik:RadBorder>
            <Label
                x:Name="lblStatus"
                FontSize="14"
                HorizontalOptions="Center"
                HorizontalTextAlignment="Center"
                IsVisible="False"
                Text=""
                TextColor="Green" />
            <telerik:RadButton
                x:Name="btnStart"
                BackgroundColor="#4CAF50"
                Clicked="BtnStartRecording_Clicked"
                CornerRadius="20"
                HorizontalOptions="Center"
                Text="Start Recording"
                TextColor="White" />
            <telerik:RadButton
                x:Name="btnPickFolder"
                BackgroundColor="#2196F3"
                Clicked="BtnPickFolder_Clicked"
                CornerRadius="20"
                HorizontalOptions="Fill"
                Text="Select Folder"
                TextColor="White" />
            <telerik:RadButton
                x:Name="btnSaveFile"
                BackgroundColor="#FB8C00"
                Clicked="BtnSaveFile_Clicked"
                CornerRadius="20"
                HorizontalOptions="Fill"
                Text="Save Transcription File"
                TextColor="White" />
            <Label
                x:Name="lblSelectedFolder"
                FontSize="12"
                HorizontalOptions="Center"
                Opacity="0.7"
                Text="No folder selected."
                TextColor="{DynamicResource PrimaryTextColor}" />
        </VerticalStackLayout>
    </ScrollView>
</ContentPage>
- Replace the code-behind content of the file—that is, the content of
MainPage.xaml.cs—with the following:
public partial class MainPage : ContentPage
{
    public MainPage()
    {
        InitializeComponent();
    }

    private async void BtnStartRecording_Clicked(object sender, EventArgs e)
    {
    }

    private async void BtnPickFolder_Clicked(object sender, EventArgs e)
    {
    }

    private async void BtnSaveFile_Clicked(object sender, EventArgs e)
    {
    }
}
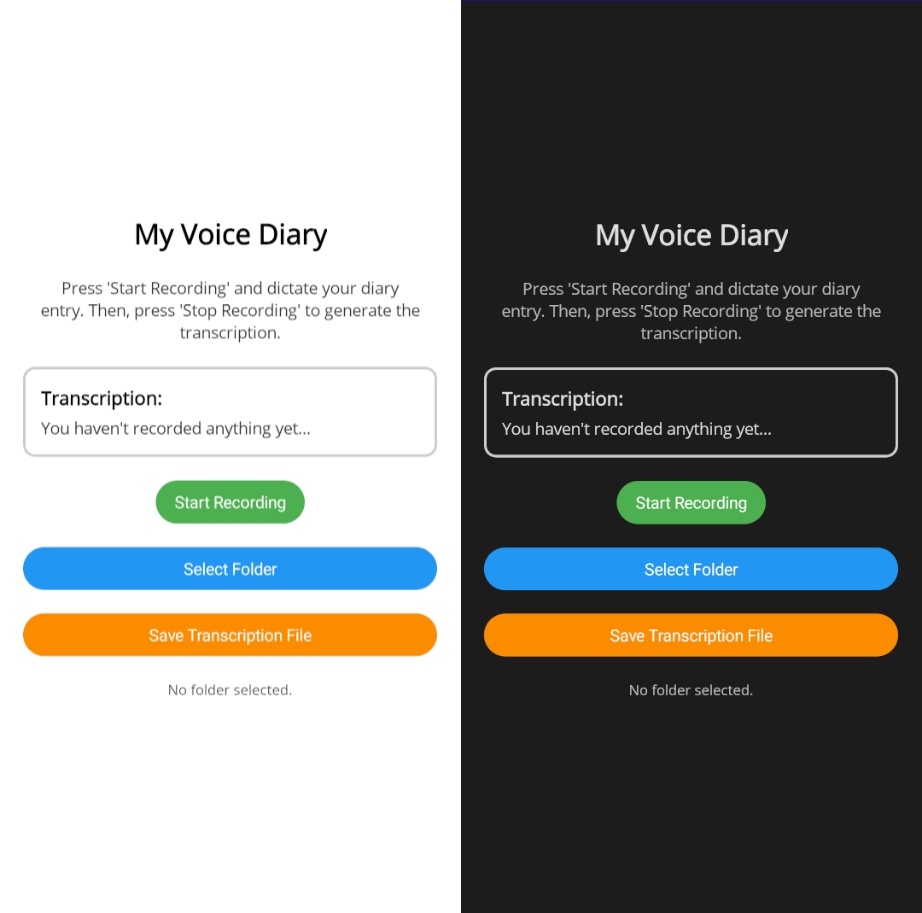
When running the application with the previous steps implemented, we will have a beautiful graphical interface in both dark and light themes:
Now, let’s see how to implement Essentials in the application.
Implementing AppTheme Resources
If you have worked with the AppThemeBinding extension to set values depending on the theme selected by the user (as in our example app), you might have encountered situations where you needed to define the same value for the Light and Dark properties in multiple controls.
While it’s true that you could simplify this process by creating resource dictionaries and styles, there might come a time when you want to reuse a resource with Light, Dark and Default properties, centralizing these values in one place. This can be achieved using AppThemeObject and AppThemeColor from Essentials, which enable you to create theme-aware resources for your applications that adapt to the user’s device theme.
It’s worth noting that AppThemeObject and AppThemeColor are built on the concepts of AppThemeBinding, which allows them to be used in a resource dictionary.
Creating AppThemeObject
AppThemeObject is a generic theme-aware object that lets you set any value to the Light, Dark and Default properties. For example, suppose in our application we want to store logo values in a resource dictionary that you’ll reuse repeatedly. Let’s define an AppThemeObject resource, to which we can assign any value as follows:
<ContentPage.Resources>
    <toolkit:AppThemeObject
        x:Key="Logo"
        Dark="logo_dark.png"
        Light="logo_light.png" />
</ContentPage.Resources>
It’s important to note that the defined object must be compatible with the assigned property; otherwise, an exception will be thrown.
Next, we can reuse the resource from any Image control using AppThemeResource and referencing the resource as follows:
<Image Source="{toolkit:AppThemeResource Logo}" WidthRequest="150" />
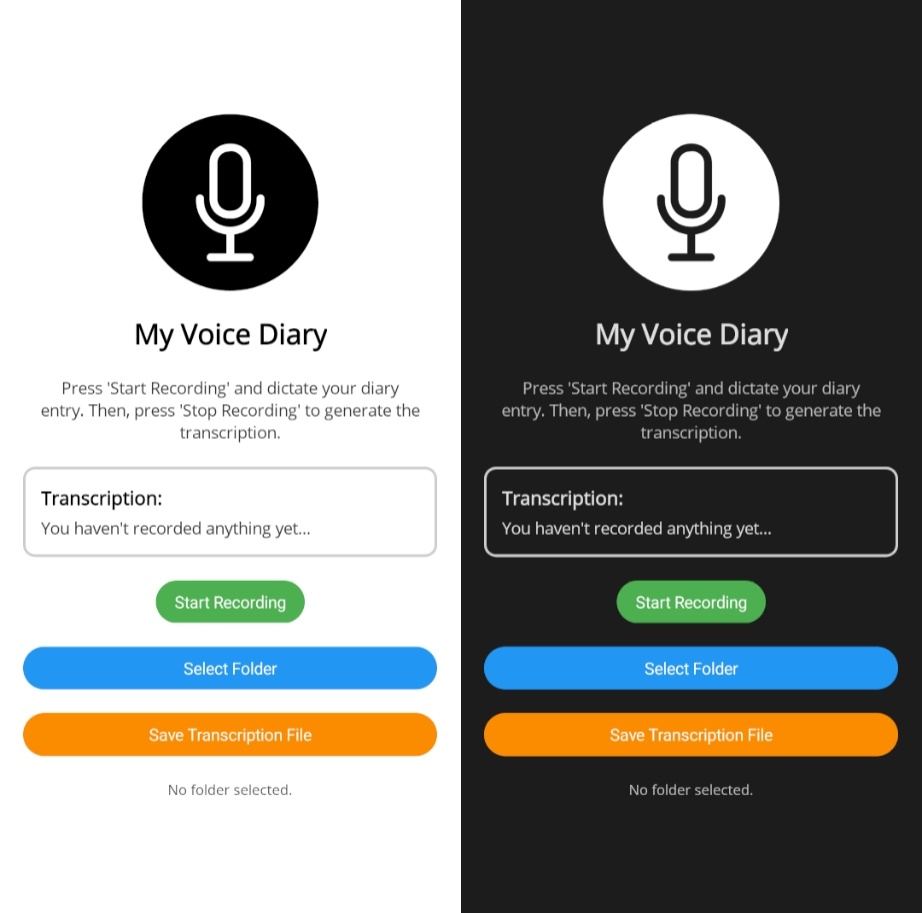
With the above code implemented, we see the logo displayed in the application, which changes depending on the theme selected by the user:
Now, let’s see how to create AppThemeColor objects.
Creating AppThemeColor
AppThemeColor is a specialized and theme-aware Color type that lets you set a color for the Light, Dark and Default properties. In the sample app, we’ll replace the use of AppThemeBinding with AppThemeResource. To do this, we’ll create an AppThemeColor resource in the ContentPage resources as follows:
<ContentPage.Resources>
    <toolkit:AppThemeObject
        x:Key="Logo"
        Dark="logo_dark.png"
        Light="logo_light.png" />
    <toolkit:AppThemeColor
        x:Key="TextColor"
        Dark="#DDD"
        Light="Black" />
</ContentPage.Resources>
Next, we will replace references where we find the use of AppThemeBinding with the use of AppThemeResource referencing the AppThemeColor resource:
<Label
    FontAttributes="Bold"
    FontSize="24"
    HorizontalOptions="Center"
    Text="My Voice Diary"
    TextColor="{toolkit:AppThemeResource TextColor}" />
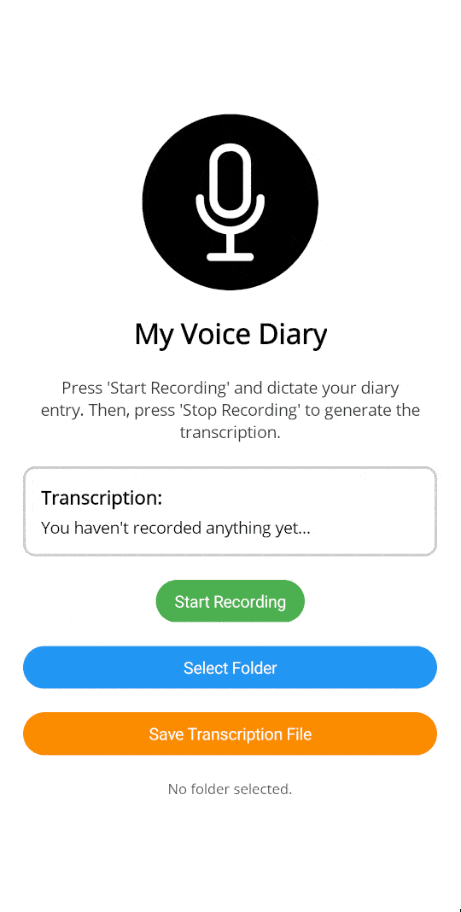
Although there are no visual changes to the interface, we will have centralized the color resource, allowing it to be applied not only to a single control but to any control we want, such as a Button, Entry, etc.
Easily Selecting Folders with FolderPicker
The FolderPicker class is extremely useful when we need to select a folder on the device. To use it, we need to enable the corresponding permissions by following the documentation guide. For example, for Android, we need to configure the following permission in the manifest:
<uses-permission android:name="android.permission.READ_EXTERNAL_STORAGE" />
Once the necessary permissions are configured, we can use the PickAsync method of the FolderPicker class directly where needed as follows:
var result = await FolderPicker.Default.PickAsync(cancellationToken);
In the above method, PickAsync is the method that allows folder selection and also automatically requests permission to access it. The result of the execution returns a FolderPickResult type with the following properties:
Folder(Folder): The selected folderException(Exception): If the operation fails, returns the exceptionIsSuccessful(bool): Indicates whether the execution was successful
Another way to use PickAsync is by registering the service as a Singleton in MauiProgram.cs as follows:
public static class MauiProgram
{
    public static MauiApp CreateMauiApp()
    {
        var builder = MauiApp.CreateBuilder();
        ...
#if DEBUG
        builder.Logging.AddDebug();
#endif
        builder.Services.AddSingleton<IFolderPicker>(FolderPicker.Default);

        return builder.Build();
    }
}
With this, we can inject the dependency wherever needed, in our case, in the MainPage constructor:
public partial class MainPage : ContentPage
{
    private readonly IFolderPicker folderPicker;
    private string? selectedFolderPath;
    public MainPage(IFolderPicker folderPicker)
    {
        InitializeComponent();
        this.folderPicker = folderPicker;
    }
    ...
}
Finally, the implementation of the event handler for the btnPickFolder button will look as follows:
private async void BtnPickFolder_Clicked(object sender, EventArgs e)
{
    lblStatus.IsVisible = false;
    var result = await folderPicker.PickAsync(CancellationToken.None);
    if (result.IsSuccessful)
    {
        selectedFolderPath = result.Folder.Path;
        lblSelectedFolder.Text = $"Selected Folder:
{selectedFolderPath}";
        await Toast.Make("Folder selected successfully").Show();
    }
    else
    {
        await Toast.Make($"
Error selecting folder: {result.Exception?.Message}").Show();
    }
}
The result of running the application with the above change will look like this:
Now, let’s see how to save files using FileSaver.
Saving Files in .NET MAUI Using FileSaver
FileSaver is a class that allows selecting the location to save a file, regardless of the operating system in use. You can see the required permissions for each operating system in the official documentation. For instance, to save files using Android, you need to enable the following permissions:
<uses-permission android:name="android.permission.READ_EXTERNAL_STORAGE" />
<uses-permission android:name="android.permission.WRITE_EXTERNAL_STORAGE" />
The way to save a file is by using the SaveAsync method of the FileSaver class, which you can use directly as follows:
var fileSaverResult = await FileSaver.Default.SaveAsync("test.txt", stream, cancellationToken);
In the above code, the SaveAsync method allows selecting the location where a file will be saved in the file system, while also requesting the necessary permission if required. We can access the result of executing SaveAsync through the following properties:
FilePath(string): Provides the location on disk where the file was saved.Exception(Exception): Provides information in case an exception occurs during the method execution.IsSuccessful(bool): Provides a boolean value to determine whether the operation was successful.
As with FolderPicker, it is possible to register a Singleton instance of FileSaver in MauiProgram.cs to inject it where needed, as follows:
public static class MauiProgram
{
    public static MauiApp CreateMauiApp()
    {
        ...
        builder.Services.AddSingleton<IFolderPicker>(FolderPicker.Default);
        builder.Services.AddSingleton<IFileSaver>(FileSaver.Default);

        return builder.Build();
    }
}
In our example, we inject the reference into the MainPage constructor:
public partial class MainPage : ContentPage
{
    private readonly IFolderPicker folderPicker;
    private string? selectedFolderPath;

    private readonly IFileSaver fileSaver;

    public MainPage(
        IFolderPicker folderPicker,
        IFileSaver fileSaver)
    {
        InitializeComponent();
        this.folderPicker = folderPicker;
        this.fileSaver = fileSaver;
    }
}
Finally, we add the logic to the event handler for the btnSaveFile button:
private async void BtnSaveFile_Clicked(object sender, EventArgs e)
{
    lblStatus.IsVisible = false;
    if (string.IsNullOrWhiteSpace(selectedFolderPath))
    {
        await Toast.Make("Please select a folder before saving.").Show();
        return;
    }

    string diaryContent = lblDiary.Text ?? string.Empty;
    if (string.IsNullOrWhiteSpace(diaryContent) || diaryContent == "You haven't recorded anything yet..." || diaryContent == "Say your diary entry!")
    {
        await Toast.Make("There's no text to save.").Show();
        return;
    }

    using var stream = new MemoryStream(Encoding.UTF8.GetBytes(diaryContent));

    var fileName = $"Diary_{DateTime.Now:yyyy-MM-dd_HH-mm-ss}.txt";
    var saveResult = await fileSaver.SaveAsync(fileName, stream, default);

    if (saveResult.IsSuccessful)
    {
        await Toast.Make($"File saved at: {saveResult.FilePath}").Show();
    }
    else
    {
        await Toast.Make($"Error saving file: {saveResult.Exception?.Message}").Show();
    }
}
The above code allows us to save a transcription of a voice recording.
Native Speech to Text Using Essentials
Essentials makes it very simple to extract text from an audio recording. First, enable the permissions according to the platform you are working on by following the official documentation. For Android, you should add the following permission:
<uses-permission android:name="android.permission.RECORD_AUDIO" />
Next, we can request permission from the user to record audio using the RequestPermissions method of the SpeechToText class:
var isGranted = await SpeechToText.Default.RequestPermissions();
The result of RequestPermissions is a boolean value indicating whether the permission was successfully granted. Otherwise, we can inform the user that the permission was denied as follows:
if (!isGranted)
{
    await Toast.Make("Permission not granted").Show(CancellationToken.None);
    return;
}
If the user grants permission, we can use the ListenAsync method to start the recording and text extraction process as follows:
var recognitionResult = await SpeechToText.Default.ListenAsync(
                        CultureInfo.CurrentCulture,
                        new Progress<string>(partialText =>
                        {
                            Debug.WriteLine(partialText);
                        }));
You can see that ListenAsync takes two parameters: the first to determine the speaker’s language, and the second, of type IProgress, allows performing an action with the partially recognized text. If you want to work only with the final text, you can use the execution result. In our case, we store the result in the recognitionResult variable:
if (recognitionResult.IsSuccessful)
{
    Debug.WriteLine(recognitionResult.Text);
}
else
{
    await Toast.Make(recognitionResult.Exception?.Message ?? "Unable to recognize speech").Show(CancellationToken.None);
}
It is also possible to use dependency injection with SpeechToText. To do so, we must register a Singleton instance of SpeechToText as follows in MauiProgram.cs:
public static class MauiProgram
{
    public static MauiApp CreateMauiApp()
    {
        ...
        builder.Services.AddSingleton<IFolderPicker>(FolderPicker.Default);
        builder.Services.AddSingleton<IFileSaver>(FileSaver.Default);
        builder.Services.AddSingleton<ISpeechToText>(SpeechToText.Default);

        return builder.Build();
    }
}
Next, we inject the reference into the MainPage constructor:
public partial class MainPage : ContentPage
{
    private readonly IFolderPicker folderPicker;
    private string? selectedFolderPath;

    private readonly IFileSaver fileSaver;
    private readonly ISpeechToText speechToText;
    private StringBuilder _diaryTextBuilder = new();

    public MainPage(
        IFolderPicker folderPicker,
        IFileSaver fileSaver,
        ISpeechToText speechToText)
    {
        InitializeComponent();
        this.folderPicker = folderPicker;
        this.fileSaver = fileSaver;
        this.speechToText = speechToText;
    }
}
Finally, we use the previous knowledge to populate the event handler for the btnStartRecording button as follows:
private async void BtnStartRecording_Clicked(object sender, EventArgs e)
{
    _diaryTextBuilder.Clear();
    lblDiary.Text = "Waiting for dictation...";
    lblStatus.IsVisible = false;

    bool isGranted = await speechToText.RequestPermissions(CancellationToken.None);
    if (!isGranted)
    {
        await Toast.Make("Permission not granted").Show();
        return;
    }
    var recognitionResult = await speechToText.ListenAsync(
                                CultureInfo.CurrentCulture,
                                new Progress<string>(partialText =>
                                {
                                    lblDiary.Text = partialText + " ";
                                }), CancellationToken.None);

    if (recognitionResult.IsSuccessful)
    {
        lblDiary.Text = recognitionResult.Text;
    }
    else
    {
        await Toast.Make(recognitionResult.Exception?.Message ?? "Unable to recognize speech").Show(CancellationToken.None);
    }
}
With the above code, we can start recording a person’s voice and obtain the text as they speak, as shown in the following image:

Conclusion
Throughout this article, you have learned about .NET MAUI Community Toolkit Essentials and its main functionalities. You have seen how to use the AppThemeObject and AppThemeColor classes to centralize resources that depend on the theme selected by the user. Similarly, you have seen how to select folders and save files using FolderPicker and FileSaver. Finally, you have learned to extract text from a recording using SpeechToText.
Without a doubt, these features will allow you to create amazing applications for your users. It’s time to get started and add these capabilities to your own apps.
Ready to try out Telerik UI for .NET MAUI?

Héctor Pérez
Héctor Pérez is a Microsoft MVP with more than 10 years of experience in software development. He is an independent consultant, working with business and government clients to achieve their goals. Additionally, he is an author of books and an instructor at El Camino Dev and Devs School.
Related Posts
Comments
All articles
Topics
Web MobileMobile
Desktop
Design
Productivity
People
